Reading a Heat Pump over Modbus in Home Assistant — and Why It Doesn't Answer
Many heat pumps have a Modbus port for building management, and most first attempts to read it end in timeouts or numbers that make no sense. Almost always the reason is one of the same eight things. Here is how to connect a heat pump to Home Assistant over RS-485 with a small ESPHome controller, and the checklist to work through when it stays silent.
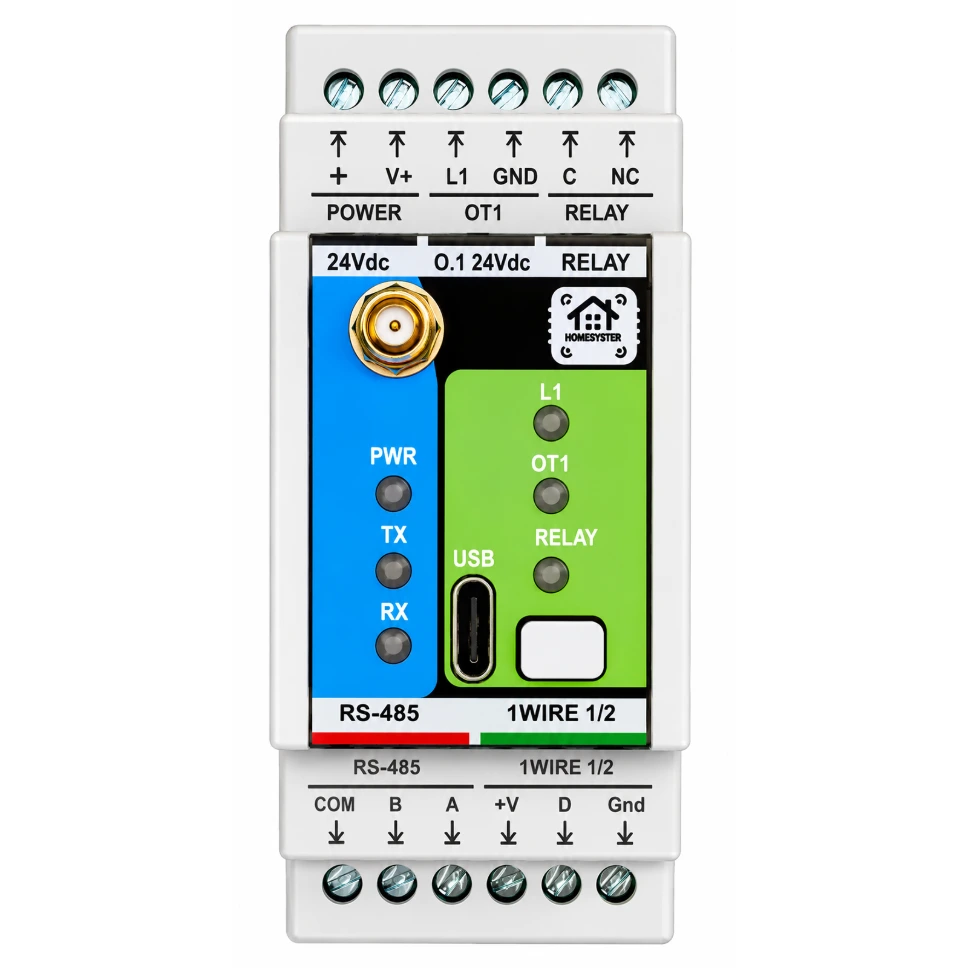
The short version. A heat pump's Modbus port is a slave: it answers questions, it never volunteers. Something has to ask, on the right wires, at the right speed, with the right address and the right register numbers. The MicroPLC is built for exactly that job: an ESP32 Modbus RTU master in two DIN modules, ESPHome pre-installed, talking to Home Assistant through the native API. It can read a heat pump on its own, or a heat pump and HomeMaster modules on the same bus.
1. What the Heat Pump's Modbus Port Is
The port goes by several names in manuals: BMS, Modbus RTU, RS-485, building management interface. On some models it is on the main controller board; on others it needs an optional interface card or has to be switched on in the installer menu before it answers anything.
Through it you can usually read flow and return temperatures, outdoor temperature, operating mode, compressor state, alarms, and on many models the energy counters. Writing is often possible too: on/off, mode, flow or room setpoints, hot-water setpoint. What exactly is exposed is in the maker's Modbus register list, which is a separate document from the user manual. Get that first.
2. Wiring
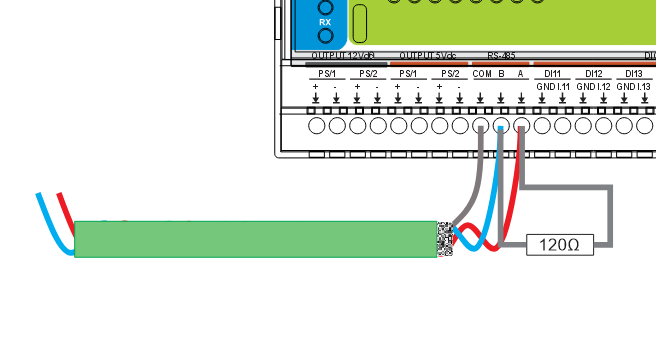
- One twisted pair plus a signal common. A to A, B to B, and the RS-485 common (marked GND, COM or 0V) between the devices. This is the signal reference, not protective earth: do not bond it to PE at each end. If the cable shield is earthed, earth it at one point only. Makers do not agree on which letter is which; if nothing answers, swapping A and B is a legitimate first test.
- Termination at both ends of the bus, not in the middle. A short single cable usually works without it; a bus with several devices does not.
- A daisy chain, not a star. RS-485 and Modbus in ESPHome covers the wiring rules in detail.
- Not galvanically isolated. The MicroPLC's RS-485 port has surge protection, not isolation. If the devices may sit at different earth potentials, or the cable leaves the building, use an isolated RS-485 repeater.
- Find the right terminals first. Some heat pumps have a dedicated terminal pair for a third-party controller; on others the only Modbus port is the bus to the wired room controller. The wiring diagram matters more than the label: on some units a pair that looks right leads to the outdoor unit and never answers.
- Never connect to a live shared bus blind. Attaching a transmitter to the bus between the heat pump and its own controller while both are running can upset both. Power down, check what is on those wires, then connect.
3. Why It Doesn't Answer: the Checklist
- The port is not enabled. Many controllers ship with Modbus switched off or set to a different protocol, in the installer menu or with DIP switches. Many units read those switches only at power-up: power-cycle the heat pump after every change.
- Something else is already the master. Modbus RTU allows one active master per bus segment. If the heat pump's own wired controller or the maker's gateway is master on that bus, a second master collides with it. Use the dedicated BMS port, not the bus between the outdoor unit and its wall controller. If the wired controller's bus is the only port, the controller has to come off it, or a multi-master hub has to sit between them.
- Wrong address. The slave address is set on the heat pump. Default is often 1, but not always, and the address shown in a service menu is not always the one the Modbus port uses. If 1 does not answer, scan.
- Wrong speed or framing. Baud rate, parity and stop bits must match exactly. 9600 8N1, 9600 8E1 and 19200 8N2 all occur. A mismatch gives silence, not an error message.
- Register numbering off by one. Documents write 40001, 30001, 1 or 0 for the same register. ESPHome uses the zero-based address on the wire, so "40001" is usually address 0, holding register. Register lists are not always right either: check one value against the heat pump's display before trusting the rest.
- Holding or input register. Reading an input register as holding (function 3 instead of 4) returns an error or zeros. Some register lists mix the two up.
- Scale and sign. A temperature of 235 is usually 23.5 °C; a negative outdoor temperature arrives as a large unsigned number unless the value is read as signed. Energy counters are often 32-bit and span two registers.
- Polling too fast. Some heat pump controllers answer slowly, a few hundred milliseconds per request. Thirty registers read one by one can take most of a 30-second interval. Poll every 10–30 seconds, not every second, and read only what you use.
If the values arrive but do not match what the heat pump's display shows, it is almost always items 5 to 7: wrong register, wrong type, or wrong scale.
Check It from a Laptop First
Before writing any ESPHome configuration, connect to the heat pump with a USB to RS-485 adapter and a PC. It takes a few minutes and separates the two questions that otherwise get mixed up: does the heat pump answer at all, and is my controller configuration right. Wire the adapter exactly where the controller will go, same pair, same common, same termination.
- Find the address and framing. An address scanner such as CAS Modbus Scanner (free, Windows) polls a range of slave addresses at the speed and parity you set. If nothing answers, change baud rate and parity and scan again.
- Read registers by hand. QModMaster (free, open source, Windows and Linux) or Modbus Poll (commercial, with a trial) read holding and input registers and show them as signed, unsigned or 32-bit values, so you can match each one against the display.
- Script it. mbpoll is a free command-line master for Linux, Windows and macOS; a short loop over addresses or registers is often the quickest scanner of all.
When the laptop reads the right values, copy the address, framing, register numbers, types and scales into ESPHome. If the laptop gets nothing, the problem is in the heat pump, the port or the wiring, and no controller configuration will fix it.
4. The ESPHome Side
In the MicroPLC's ESPHome configuration the RS-485 port is already defined as the UART uart_modbus, and the file is made for adding your own modbus_controller blocks. A heat pump is one more controller with its own address, and one sensor per register. A shortened example, with register numbers that are illustrations, not values for any specific model:
modbus:
  id: modbus_bus
  uart_id: uart_modbus    # baud rate and parity of this UART must match the heat pump

modbus_controller:
  - id: heat_pump
    address: 1            # slave address set on the heat pump
    modbus_id: modbus_bus
    update_interval: 15s

sensor:
  - platform: modbus_controller
    modbus_controller_id: heat_pump
    name: "Heat pump flow temperature"
    register_type: holding
    address: 0            # "40001" in many register lists
    value_type: S_WORD
    multiply: 0.1
    unit_of_measurement: "°C"
ESPHome groups neighbouring registers into one request, and that is what you want: one request for twenty consecutive registers costs far less bus time than twenty requests for one register each. Lay out the sensors so they read contiguous blocks. Split a block only where the heat pump rejects it, for example because it contains a register the unit does not implement and the whole read fails or values land on the wrong sensor; force_new_range: true on a sensor starts a new request at that register. command_throttle on the controller adds a pause between requests for slow units.
Writing works the same way with a number or switch on a writable register, or a coil for on/off functions. Start read-only, compare every value with the display, then test one small, reversible write. Some units ignore a setpoint until the operating mode register is set, and some take on/off only through coils.
Write only when the value changes, never on every poll. Some controllers keep written settings in non-volatile memory, some only in RAM, and some limit how often a setting may change; the register list usually says which.
One bus has one speed. If the heat pump needs different settings from the HomeMaster modules on the same bus, either change the modules' settings where the module allows it, or give the heat pump its own MicroPLC. At this price a second controller is often the simpler answer.
Watch the bus load when several devices share it. We have seen this on our own installations: with many modules on one bus, each polled often and in small pieces, the bus fills up, requests queue behind each other, and readings start to time out or arrive late. Adding a slow heat pump to that makes it worse. On a shared bus, decide what each device really needs and how often: power or a temperature every few seconds, counters and settings once a minute or less, values nobody looks at not at all. Prefer one large request per device over many small ones, and give the slowest device the longest interval.
5. Why a Small Controller for This
- It is a Modbus master first. RS-485, 24 V supply, two DIN modules, made to sit in the cabinet next to the heat pump's electrics, not a development board in a plastic box.
- Local logic. Rules that matter, such as "switch to eco when the PV surplus ends" or "block the heat pump when the load limit is reached", can run on the controller and keep working when Home Assistant is down.
- One relay for the fallback. The single relay can drive an enable or SG-ready style input where the heat pump has one; it is a C/NC contact, closed when unpowered, so plan which state is safe.
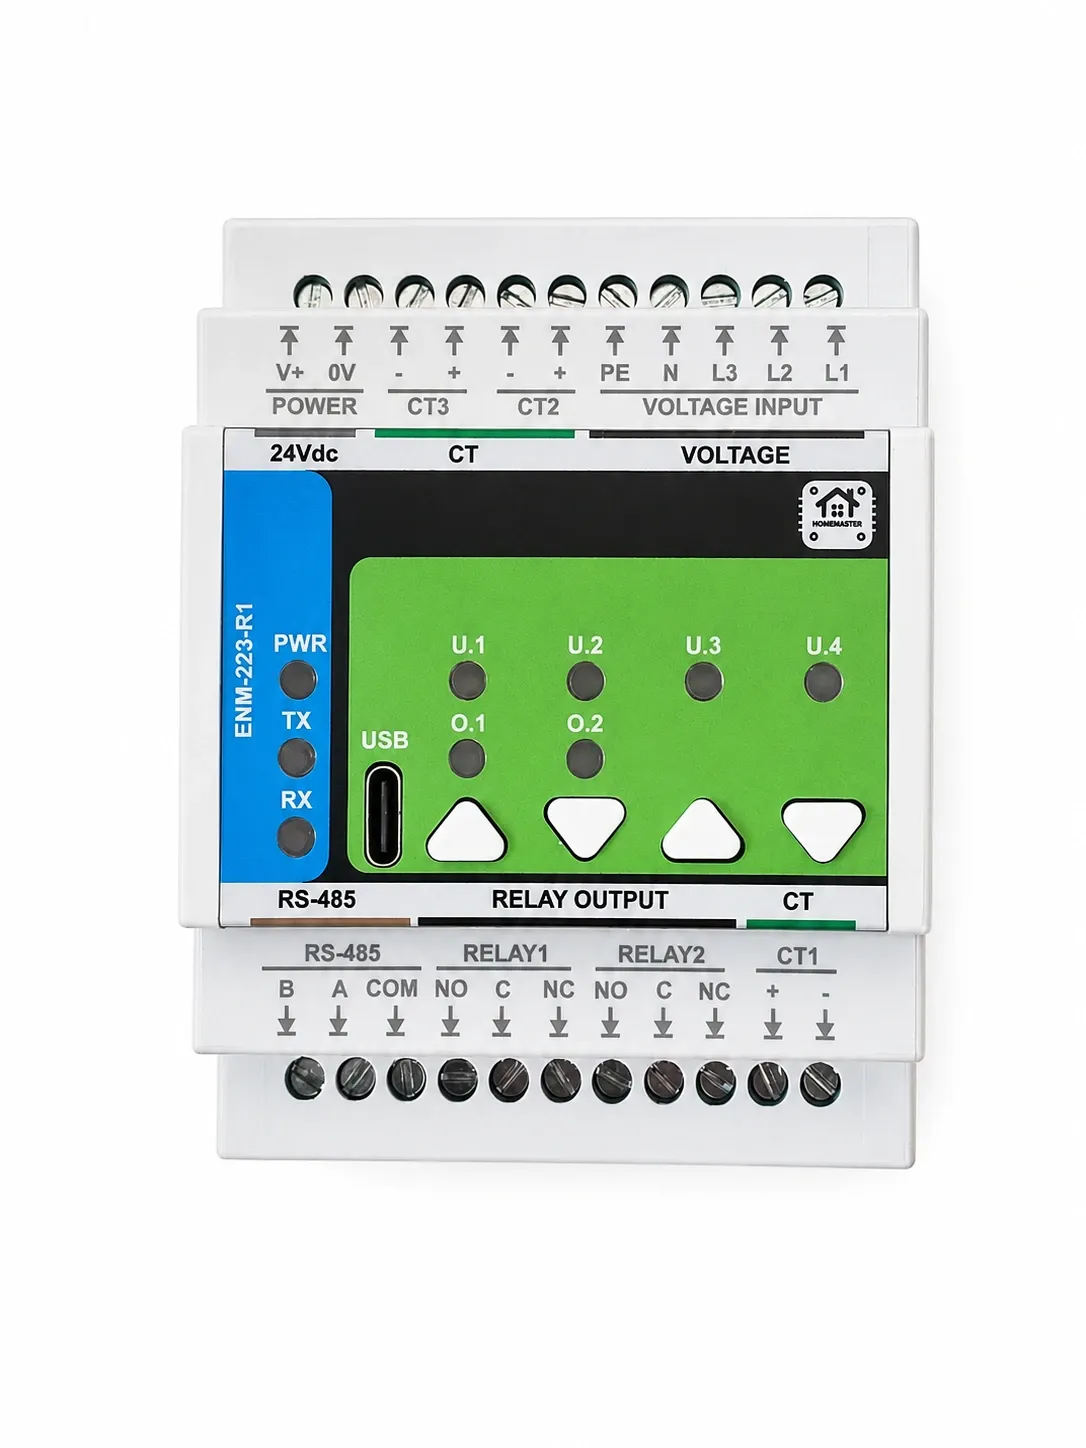
- Room to grow. The same bus takes an ENM-223-R1 to measure what the heat pump actually draws, and other modules later.
6. What This Is Not
Not a register list. Every heat pump maker publishes its own; this article does not replace it.
Not a way around a missing port. If the heat pump only talks to its maker's cloud or its own wall controller, there is nothing to read over Modbus.
Not a replacement for the heat pump's own protection. Defrost, anti-freeze and compressor protection stay in the heat pump.